
Groups
Bundle screens into groups so a single publish reaches many displays at once. Create, edit, tag, and assign screens to a group in Loopvew.
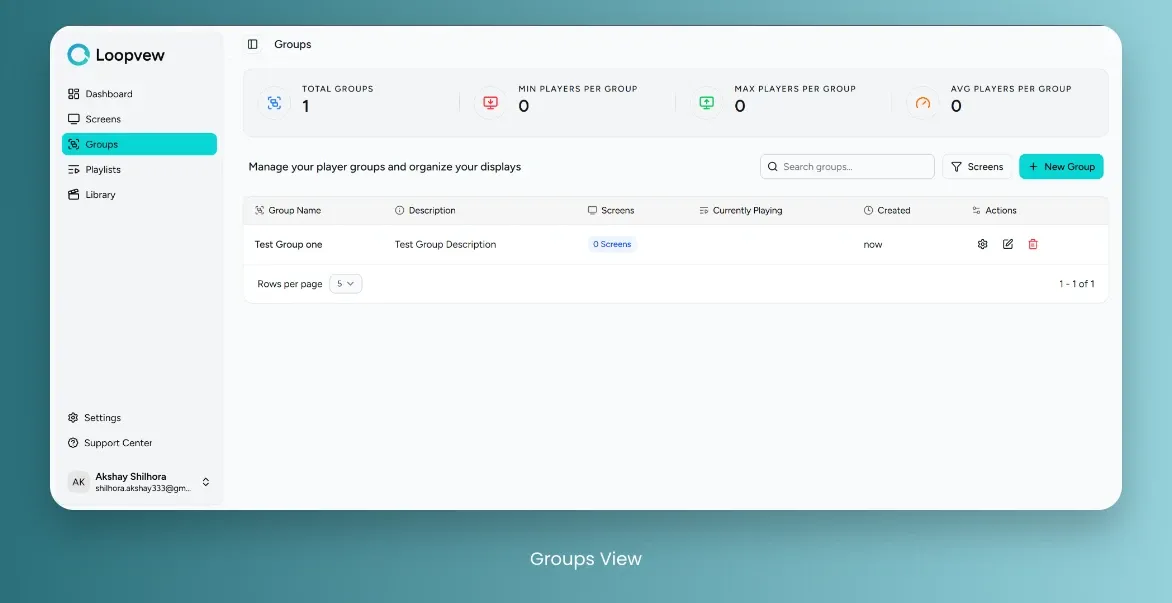
Groups Overview
Groups Stats: top bar shows the group stats:
- Total Groups: Total Number of Groups.
- Min Playlists: Minimum number of playlists in any group.
- Max Playlists: Maximum number of playlists in any group.
- Avg Playlists: Average number of playlists per group.
Groups Table: shows the list of all groups with following details:
- Group Name: Name of the group.
- Description: Description of the group.
- Screens: Number of screens in the group.
- Current Playing: current deployed playlist to the group.
- Created: created time from today.
- Action: Settings, Edit and Delete button to manage the group.
View All Groups
Open the Groups tab to see every group, its screens, and its current playlist.
-
Click on the Groups tab in the left sidebar.
The Groups view lists every group you’ve created.
Creating a Group
Create a group from the New Group button with a name, description, and optional tags.
-
Click on the Groups tab in the left sidebar.
-
Click on the New Group button.
-
Enter the Group Name and Description.
-
Optionally, assign some Tags to the group.
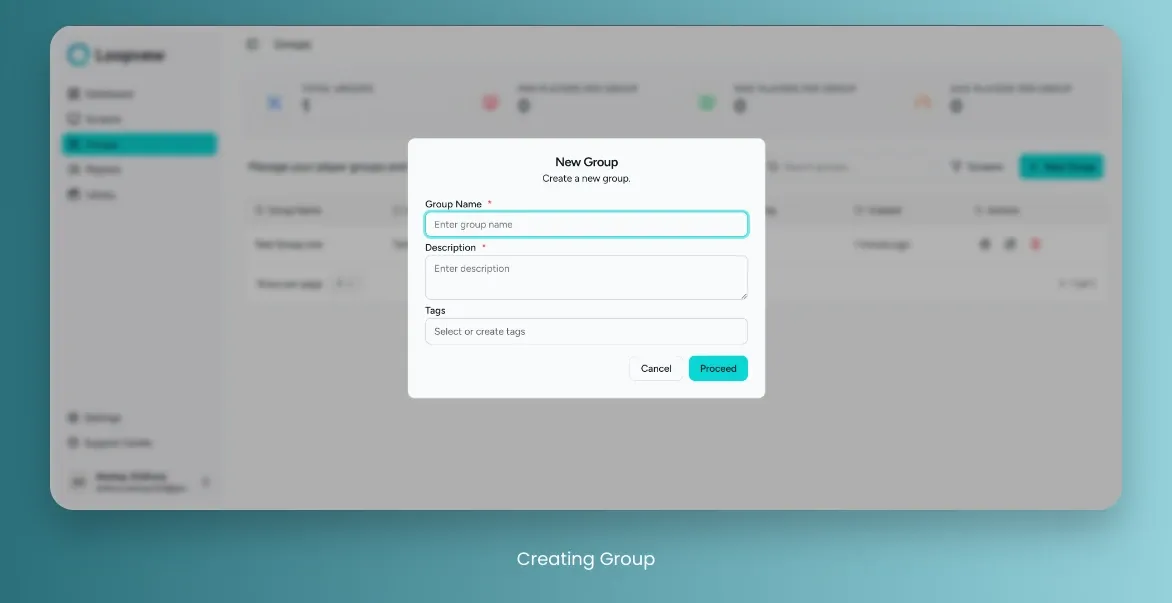
The New Group dialog — name, description, and tags. -
Click on Proceed to create the group.
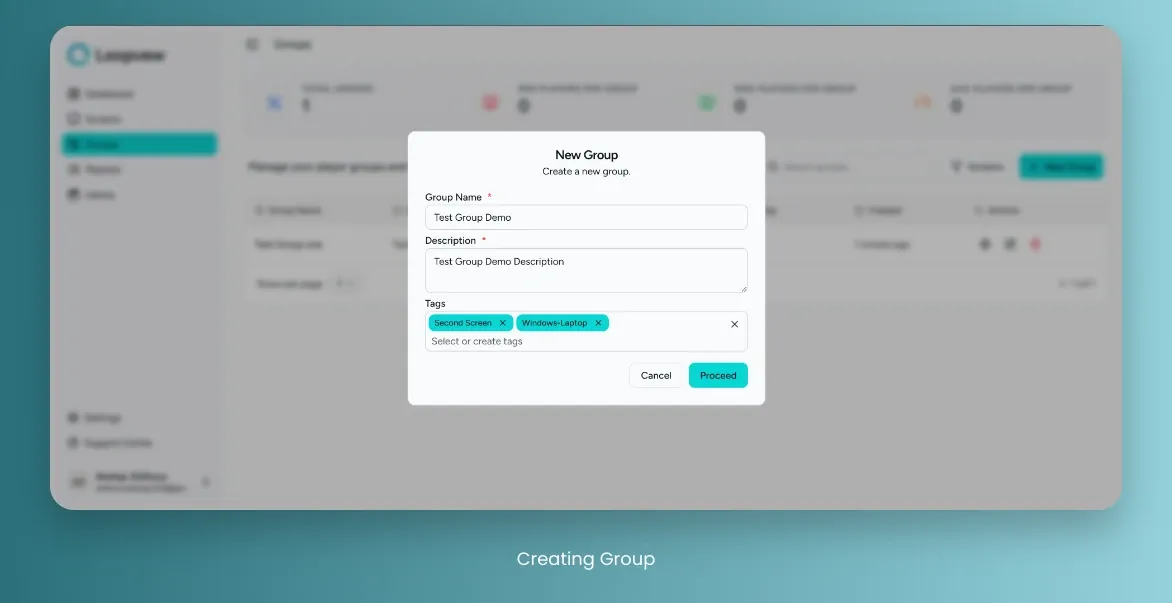
A filled-out New Group dialog, ready to create.
Edit a Group
Edit a group’s name, description, or tags from its Edit action.
-
Click on the Groups tab in the left sidebar.
-
Click on the Edit Button for the specific group.
-
Update the Group Name or Description as needed.
-
Optionally, assign some Tags to the group.
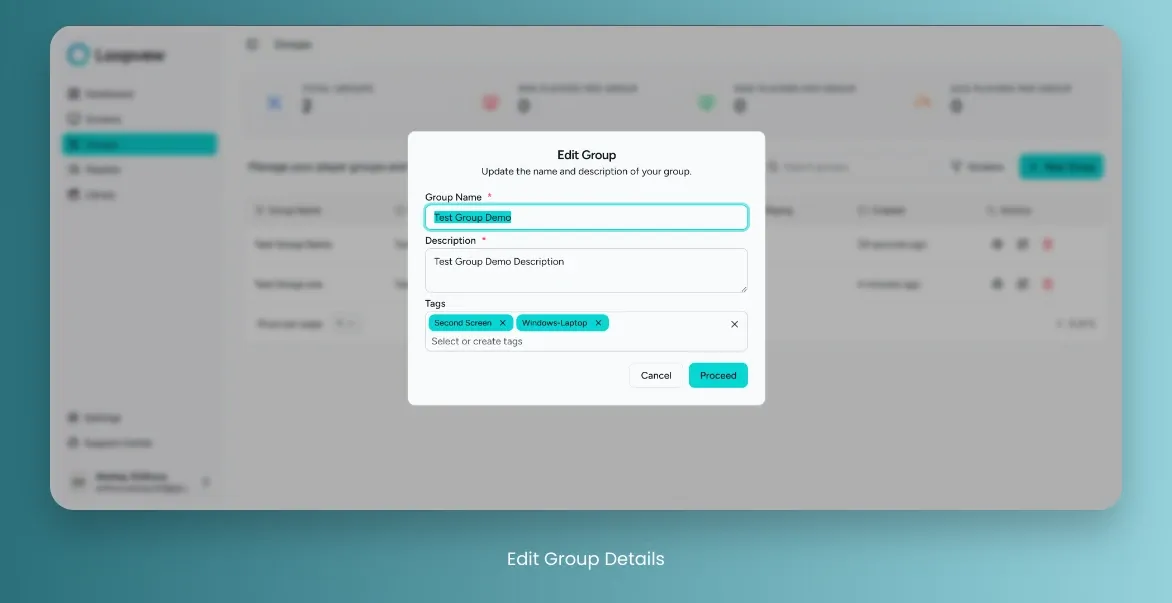
Editing a group’s name, description, and tags. -
Click on the Proceed Button to save your changes.
Delete a Group
Delete a group from its Delete action, then confirm.
-
Click on the Groups tab in the left sidebar.
-
Click on the Delete Button for the specific group you want to remove.
-
Click on the Delete Button to confirm deletion of group.
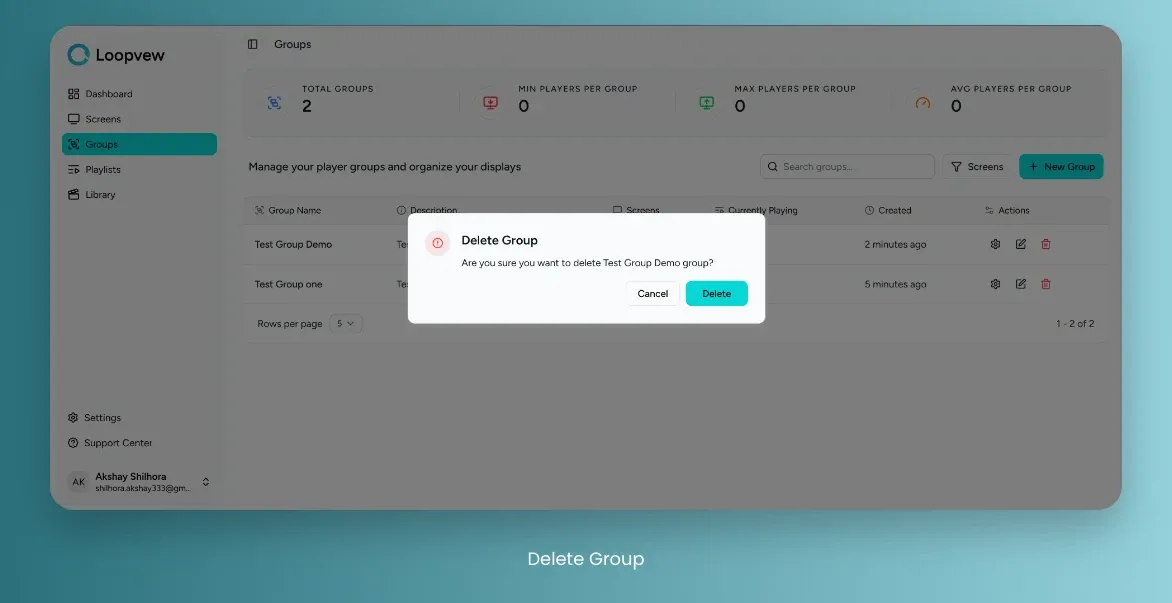
Confirming deletion of a group.
Add Screens to a Group
Add screens to a group from the group’s Settings → Screens tab.
-
Click on the Groups tab in the left sidebar.
-
Click on the Settings Button for the specific group.
Open a group’s settings from the Groups table. -
Click on the Screens tab.
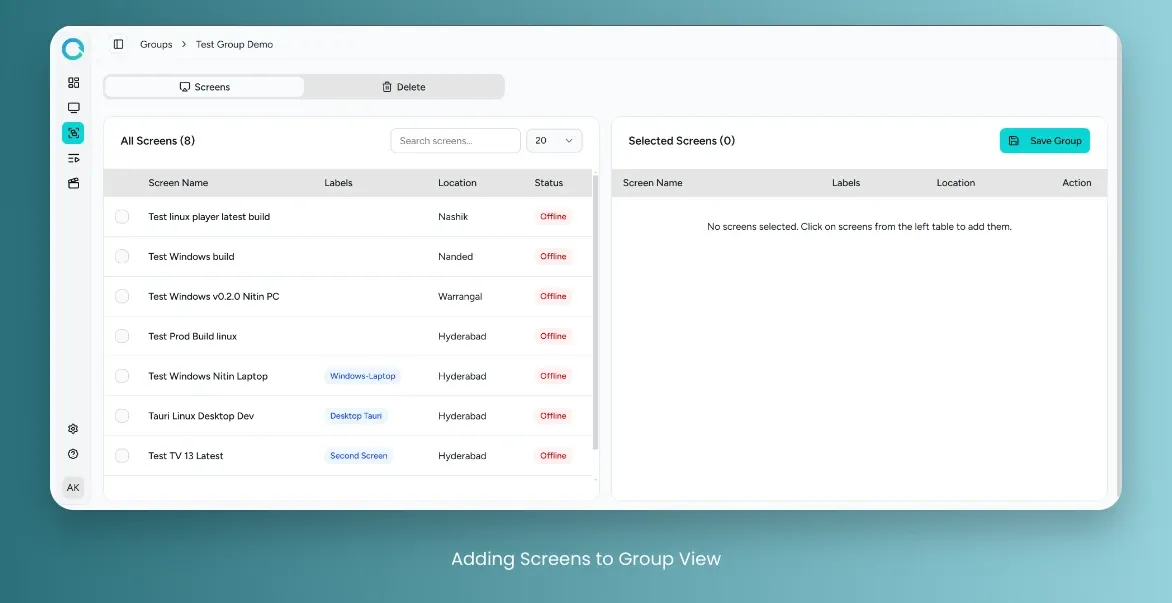
The Screens tab of a group, before any screens are added. -
Choose the screens you want to add to the group, from the All Screens section.
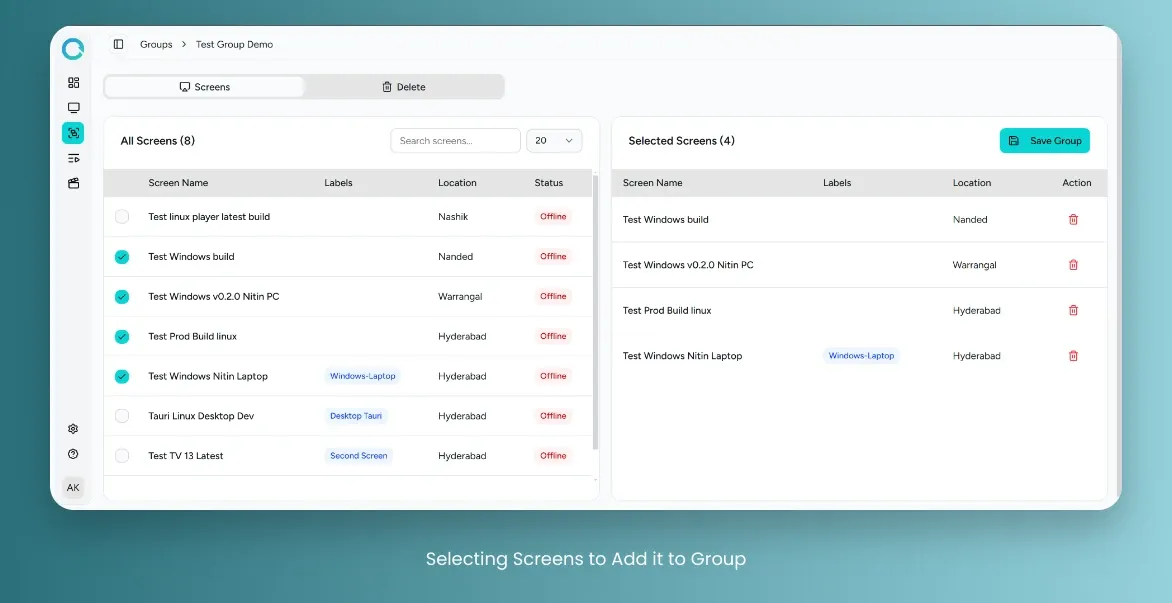
Selecting screens to add to the group. -
Click on the Save Group button to save the changes.
Check Total Screens in a Group
The Screens column in the Groups table shows how many screens each group holds.
-
Click on the Groups tab in the left sidebar.
-
In the Table Section view the Screens column to see the number of screens in each group.
The Screens column shows how many screens each group holds.
Check Selected Screens in a Group
A group’s selected screens are listed under its Settings → Screens tab.
-
Click on the Groups tab in the left sidebar.
-
Click on the Settings Button for the specific group.
-
Click on the Screens tab.
-
View the list of screens that are currently selected for the group in the Selected Screens component.
The Selected Screens list — the screens currently in the group.
Delete an Existing Screen in a Group
Remove a screen from a group from the group’s Settings → Screens tab.
-
Click on the Groups tab in the left sidebar.
-
Click on the Settings Button for the specific group.
-
Click on the Screens tab.
-
In the list of Selected Screens, click on the Delete Button next to the screen you want to remove.
Removing a screen from the group’s Selected Screens list. -
Click on the Save Group button to apply the changes.